Easy Breezy Sourdough
- Mel
- Jul 10
- 3 min read
You don't want to read reams before you get to the actual recipe so here it is:
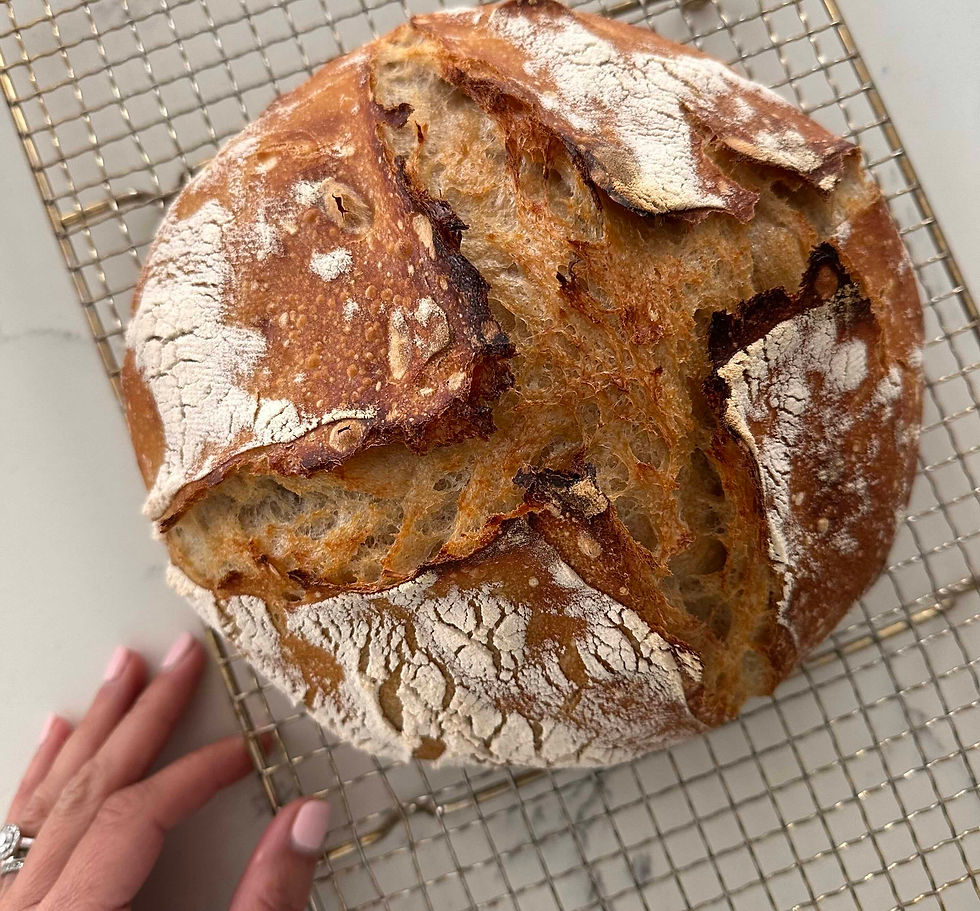
Ingredients: ( makes 1 lovely big loaf like the pic)
Sourdough starter (a recipe for another time!) feeding instructions here
Salt (I use Malden sea salt)
Bread flour, I like Allisons
Water
Things you will need:
A "dutch oven" (whats that?!) Ok so don't go buying anything new. You can use a Le Creuset pot or basically anything that goes in the oven with a lid that's large - I use a Tagine and it works really well!
Baking paper
A large mixing bowl
A tea towel
A scraper ( I use a plastic cake one) I have these and use the square-ish one
A square sided dish/bowl etc (its easier to see your dough double in size with a straight edged dish compared to a bowl - believe me I tried the bowl)
Digital scales
My Super Simple Method:
Step 1: Making your sourdough: 5-10 mins Pop your tub on the scale and zero it, then add:
100g of your starter (pop the rest back in the fridge)
370g of water
11g of salt
500g of bread flour
Mix all of the ingredients thoroughly, (a bit of elbow work!)
Cover with the tea towel to let the dough grow (ferment) until puffy, bubbly, and roughly doubled by 50% (I usually pop a line on the tub)
It'll look something like this:
pic 1. thats 100g of starter pic 2 is with the flour in.


Step 2:
Shaping the dough: 5 mins + 25 mins resting
Flour a clean surface - wood board or kitchen worktop (Do not scrimp on well-floured!)
Scrape the dough onto that surface. I won't lie this is messy so just get in it - it'll stick to the sides so get as much as you can out.
Gently pull 1 side of your sticky messy dough up and over onto itself to form a sort of rectangle shape do this on 3 other sides. So you basically fold it in on itself and do the same on all 4 sides - doesn't need to be exact!
Cover it loosely with a tea towel and let it rest for 25 minutes (if you forget about it 30mins or more is fine too)
Step 3:
Time to get proving: 5 mins + then fridge or side time
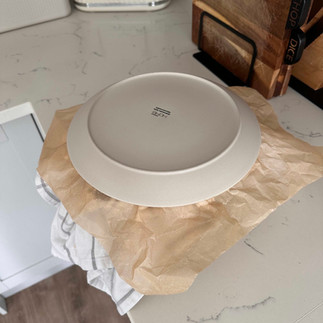
Get your mixing bowl and line with the tea towel
Sprinkle with lots of flour (make sure it’s nicely covered so the dough doesn’t stick)
Shape the dough with that flat cake shaper thing (see pic) into a roundish shape.
Then pick it up (don't worry that it will feel like its falling out of your hand - I usually pick it up and quickly pop it in the bowl. Don't worry if it looks a bit ugly it'll taste YUM.
Fold the edges of the tea towel over the dough to cover it.
Now you can choose to either: Let the dough “proof” anything from 12 -48 hours in the fridge (I’ve done 2 hours and it’s fine) OR leave on the side for 1-3hrs (I've even done 1 hour)
Step 4:
Baking: 45 mins
preheat* oven to 230C (with the dish in the oven) *You need around for 15mins to heat to 230
Get a big dinner plate & a square piece of baking paper (about the size of your mixing bowl)
Pop the baking paper on top of the bowl and then the plate on top
Turn the whole thing over & remove the bowl, then gently peel back the tea towel
With a super sharp knife score a X across the top.
Some pics to help visualise that:


Open the oven, take the lid off your dish & pop the baking paper with dough into your dish & put the lid on.
Bake at 230C for 30 mins
Take the lid off → reduce the heat to 200C and continue to bake for 15mins
Take the bread out and pop it on a wire rack to cool straight away. Voila!
I let it cool completely before cutting - I read somewhere that it's better to do that but its up to you!
Links: The No knead recipe I was inspired by here
The original recipe that helped me understand that the fridge is my friend here
Feeding your sourdough starter:
Pop an empty jar on a scale (zero it)
Add 25g of your starter into it
Add 100g water
Add 100g flour
Stir it + leave it with lid ajar until it doubles in size see pics below!


Comments